
Ikea hacking is a topic I have very mixed feelings on. For instance: why buy something that’s lower quality, and then spend a bunch of time, money and effort to make it look expensive? Why not just save up for the expensive thing, which, if it’s truly worth the money, will last you a long time? Or, you know, just be happy with the cheap thing?
I feel like I have a good reason (maybe everyone thinks that? I bet they do). Mario and I picked this bookcase for his bedroom when he still lived at home (to display his impressive DVD collection), at a time when neither of us had much money. We brought it with us when we moved into our house, and it has been in our “study” (junk room) ever since, lurking in the corner and not fitting in with our decor.
I feel like this is probably an experience many people can relate to. The good ole Billy Bookcase is so reliable, so customisable. So cheap. But it was just too big and dark for the *perfect* vision of my future study that I had in my head. So, long story short, the other weekend I decided to chop it in two and give it a makeover. What did I have to lose, right? (Actually many people pointed out that I stood to lose my fingers, but guess what – I didn’t!)
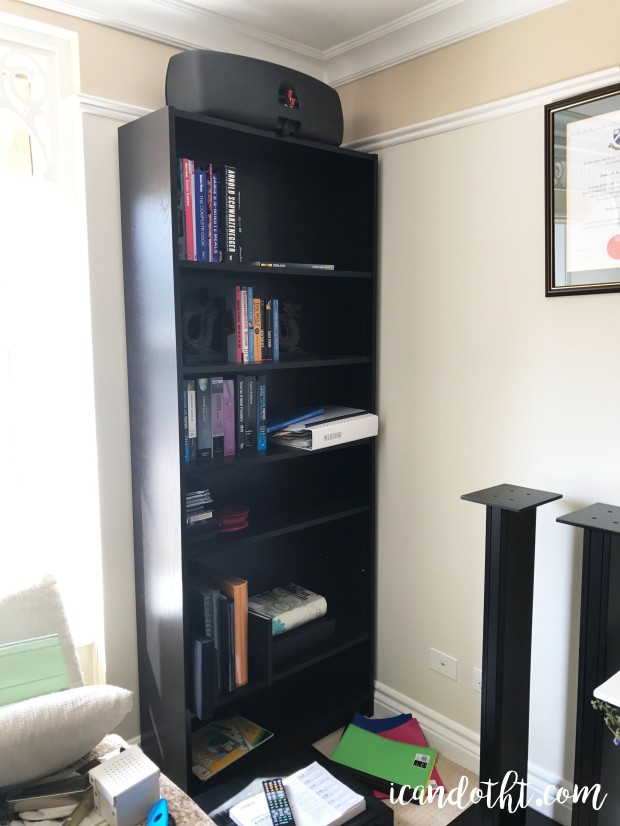
This before photo is so horrifying, I’m sorry. It was taken mid-“rearrange the entire room” phase.
I decided to go for two shorter bookshelves for a couple of reasons. One, I felt like the original bookcase was way too high for the room it was in – it just seemed to dominate. And two, having two half-height bookcases means that I can display things on the top, which adds a bit more dimension to the room.
I looked at a LOT of inspiration for the final design I wanted. I didn’t want to spend too much money (ha, that backfired), but I wanted a finished project that was sturdy, professional and polished. The style in our house has sort of an eclectic rustic/modern french farmhouse feel (yes, I know that makes no sense. It’s real though), so I wanted the bookcases to fit with that. I knew I wanted them to be white too, because I am all about making spaces feel bigger at the moment (this follows on from repainting our entire bedroom white last month).
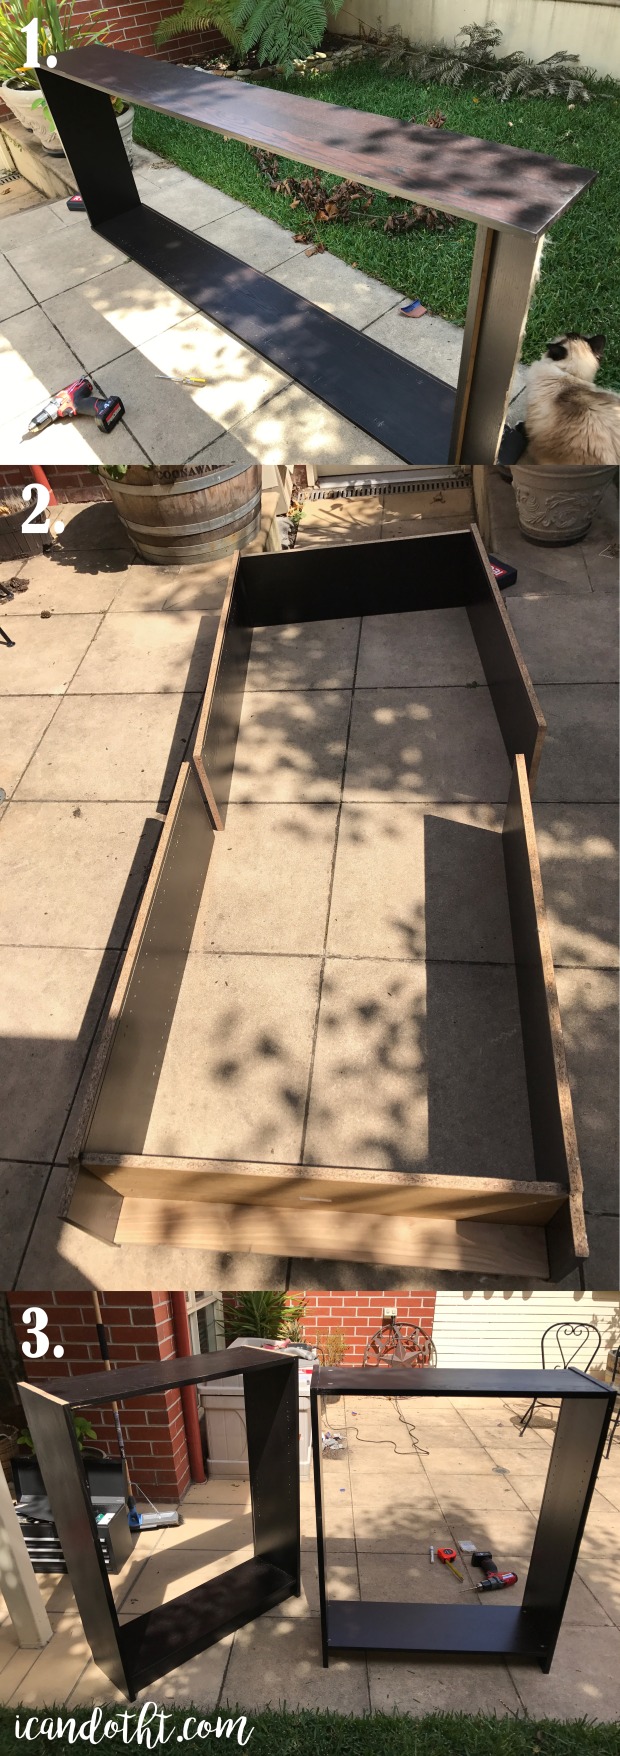
So as you can see, Steps 1, 2 and 3 involved removing the shelves and backing, and cutting the bookcase in half. I measured it first, obviously. I screwed in a new top and a new bottom to the respective halves, but not before I managed to hit my head about 3 times (don’t ask – I can’t remember).

For Steps 4, 5 and 6, I put the shelves in at the heights I wanted, and screwed them in using chipboard screws, and then started adding the trim. The shelves can no longer be moved, but luckily I am happy with the heights I chose (so far…). I countersunk all the screws so they would be invisible at the final stage. I got to use my amazzzzzzing Milwaukee cordless drill and driver that Mario got me for my birthday last year, and they are so so good. The whole project took me around 3 days, and I didn’t have to recharge them once. Plus they are so light (useful for someone with no upper body strength) and a perfect size for my hands. Ugh I love them so much. One of the best (and most useful) presents I have ever received for sure.
Anyway, the trim I used for the sides was just a cheap melamine trim, and the base was a melamine skirting board. The trim for the shelves was an oak trim, and it was my favourite. I feel like that small addition made such a huge difference to the overall project. I made alllll the cuts with my jig saw (ACTUALLY my Dad’s jig saw, but whatever), which was a little challenging at times. It has a setting to make 45 degree cuts, but without a proper cutting bench, or any clamps, they didn’t always come out perfectly. That’s what sand paper is for right?
Even more challenging was cutting out the architrave, which I decided I HAD to have. But I reckon I did a pretty decent job in the end…

They started to look so good as I added the trim and the architrave (which I cut out of 6mm MDF that I had lying around).
The final construction step was to create the new tops of the bookcases. I used some oak trim and MDF boards, cut again with the jig saw. You can see from the photo below that my mitred corners were pretttyyyyy awful. I fixed them with putty ;). How good does the (almost) finished product look?! I was seriously so proud of myself at this point.
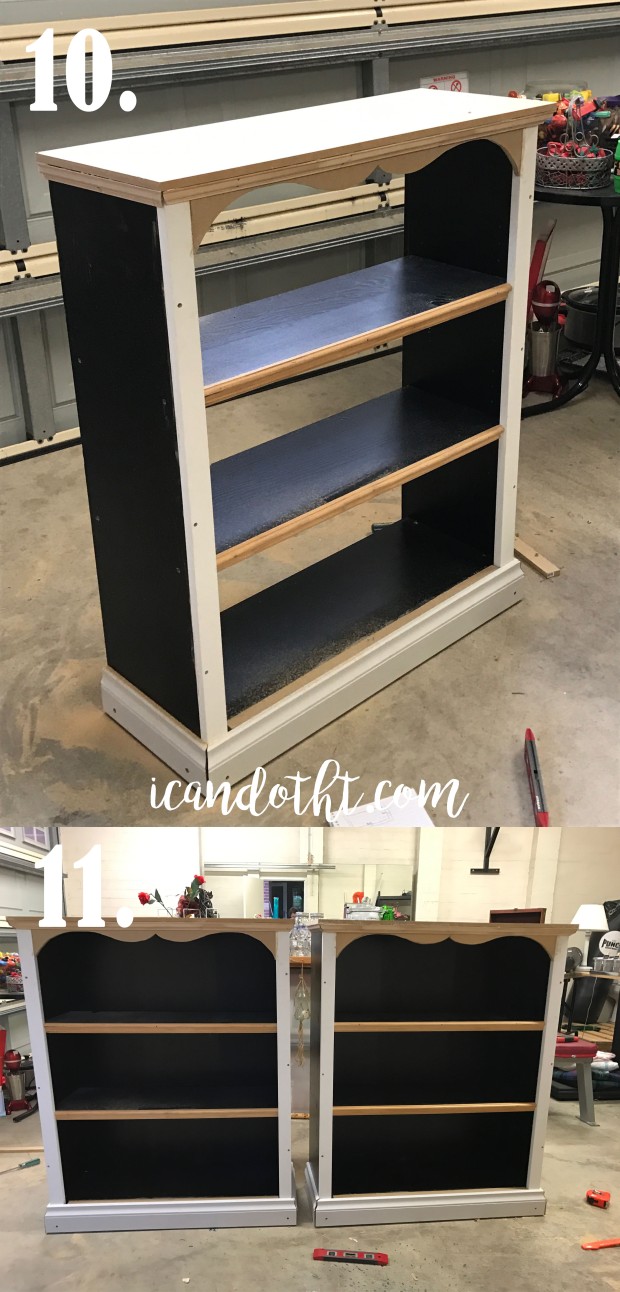
For the final steps, I cut the backing in half and nailed in it place, and then… and then. This was the point when disaster struck – the painting stage. After I spent my Saturday night painstakingly filling in all the holes and gaps, I was ready to paint. But. The paint would not stick to the bloody Ikea finish, even after I sanded like crazy. I tried everything – primer, oil paint, spray paint, you name it. Not cool. So, as you can see in the photo below, the inside of the shelves has a sliiiightly mottled look. The paint adhered perfectly to the outsides, the top, the trim and the shelves themselves, which are all the bits that can be seen once there are books on the shelves. I was planning to go back and do something about the rest at some point, but by now I had already spent about $60 on paint and primer, so I knew it was time to take a step back.
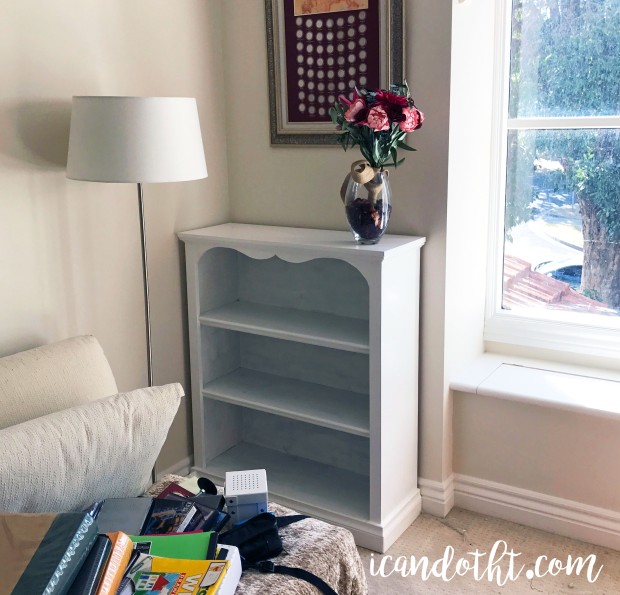
Once I started to put the books in, the paint issue really didn’t bother me anymore, because you just can’t see it. I might still try to touch it up in future, but for now I can live with it.
I can’t show you a really good after photo of the two bookcases in their final locations yet, because I want to do another post about the finished transformation of my lovely study. But I am planning to share that in the next few days, so you won’t have to wait too long :).
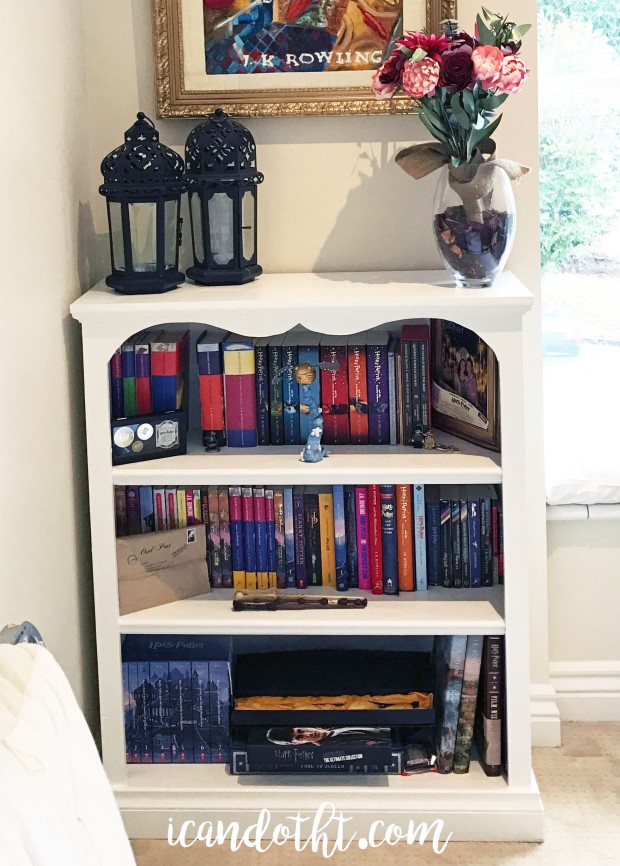
So what do you reckon – was all the effort worth it? I think so – I love my new bookcases, and I am not-so-secretly thrilled that I made them!! I feel like they look so good, and they work so much better in the room this way. Plus, I was able recycle our old bookcase – kind of hard to believe that it’s still the same one, isn’t it? I think I have to give a thumbs up to my first serious Ikea hack.

Wow!! I had no idea that they looked like that before you started! I’m so impressed!! You go girl!
AMAZING! We have a very similar bookcase and I was actually wondering the same thing the other day- about if it can be chopped in half to resize it or not. Now I can give Michael a wood work project that will also result in neatening up one of our spare rooms. LOVE IT!!!!
IKEA hacks are a wonderful thing – you could NOT buy those cases for what you paid for them. Sweat equity at it’s finest!
These came out really nice, can’t wait to see the whole room!
In the future, try using BIN primer – I have used it to paint formica tables, and it works – it is smelly, have to use it outdoors, but once it is dry, you can paint over it, no problem. However – I like the mottled look, it gives depth to the cases. :-)
Love your bookcases!